Co-registration: In this tutorial, we will walk you through the step-by-step process of co-registration, making sure your images are aligned spatially, temporally, or anatomically for precise measurements, quantitative analysis, and comparisons between different imaging studies.
Let’s begin!
Overview
This tutorial is split up into 7 parts:
- Why Image Alignment Matters?
- What is co-registration?
- Load 3D MRI for co-registration
- Checkerboard filter to highlight misalignment between two images
- Apply manual co-registration
- Resample moving image
- Saving aligned images and transform model
1 – Why Image Alignment Matters?
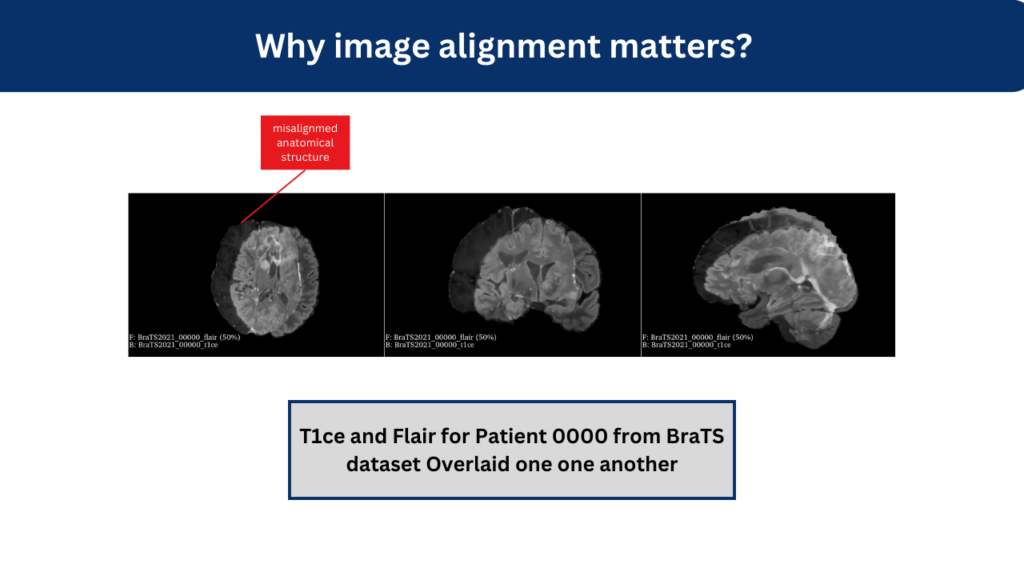
Working with misaligned images can lead to inaccurate interpretations, incorrect diagnosis, and flawed treatment plans. This is due to the distorted or mispresented spatial relationships between anatomical structures or pathological features.
2 – Align Images Using Co-Registration
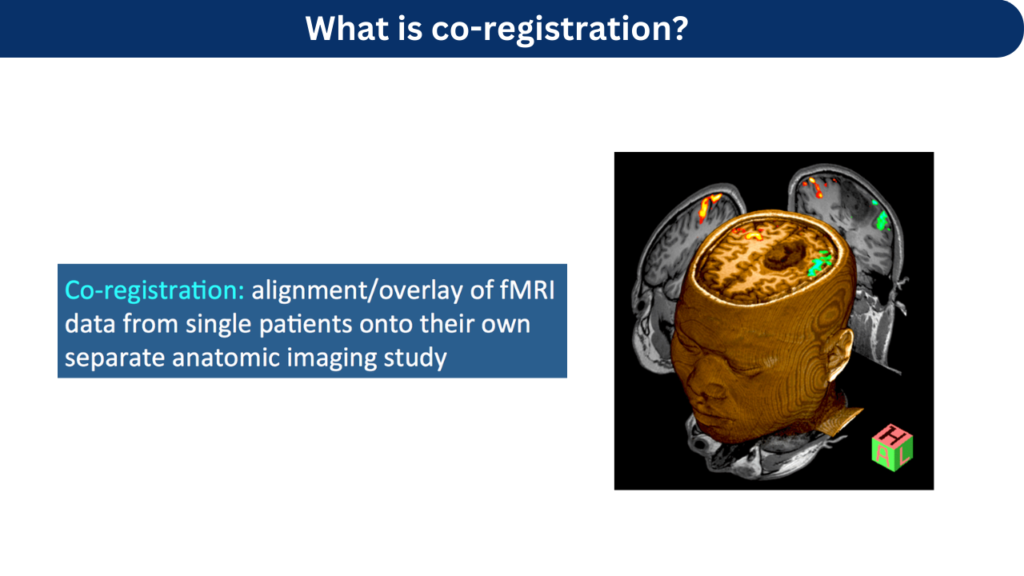
Co-registration helps you to align images obtained from different sources or times. This technique is super useful especially for clinicians and researchers to overlay images acquired through different modalities, helping with comprehensive analysis and decision-making.
While automatic co-registration methods are widely used, manual co-registration gives you a level of control and precision, essential in certain cases like medical imaging!
3 – Load 3D MRI For Co-registration
For this tutorial, we will be using Brain Tumor Segmentation (BraTS) Dataset. You can simply download the dataset and extract the zip folder to get the patient’s data.
You can load the image sample by following the steps in the demo provided above.
To show how co-registration is applied to align images, I performed some preprocessing and intentionally moved one of the two modalities to demonstrate image misalignment.
4 – Visualize Misalignment Between Images Using Checkerboard Filter
The first step is to visualize the misalignment between images to ensure accurate alignment. One effective tool for this purpose is the checkerboard filter.
i. What is the Checkerboard Filter?
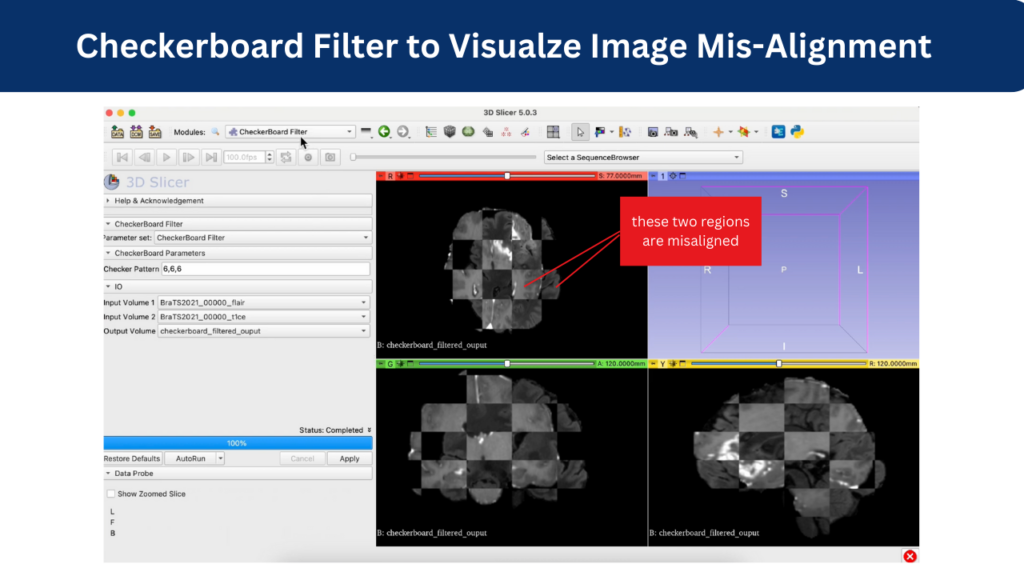
The checkerboard filter is a feature within the 3D Slicer tool that overlays two images in a checkerboard pattern, allowing users to easily identify areas of misalignment between the two images. This is really helpful in revealing discrepancies in the data.
ii. How to Use the Checkerboard Filter in 3D Slicer
After the image is loaded, navigate to the checkerboard filter from the drop-down menu and locate it. This filter is typically found within the visualization or image processing modules. Simply select the filter and apply it to your selected images as shown in the demo video. You will see a checkerboard pattern on the overlaid images, with each square representing a portion of one of the images.
With the checkerboard filter, you can easily analyze the regions/areas where squares do not align perfectly.
5 – Manual Co-Registration Using Transforms Module of 3D Slicer
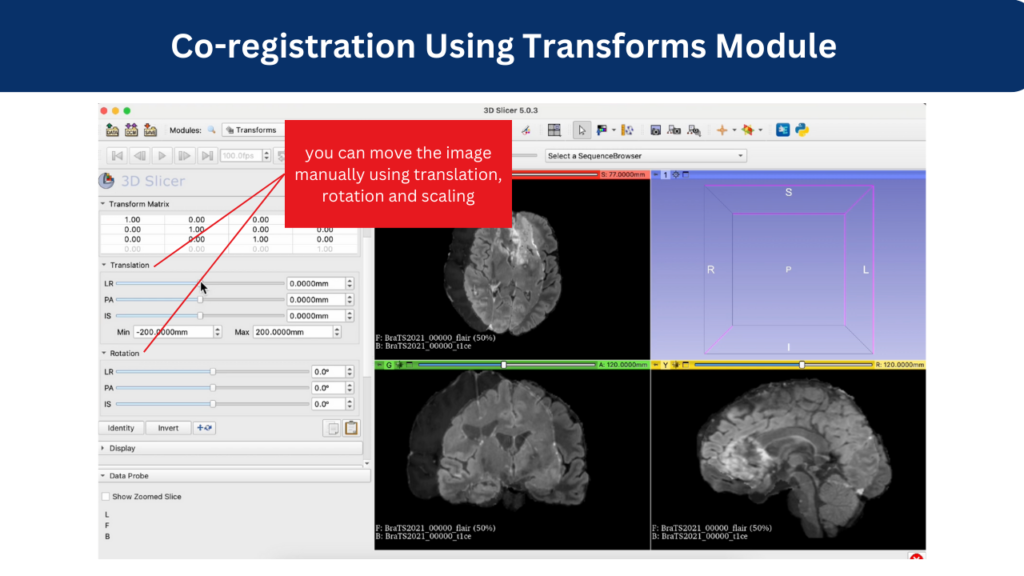
i. Identify Reference and Moving Images:
The very first step is to identify the reference and moving images. The image that is set as a reference or fixed image will serve as the anchor to which the moving image will be aligned. Typically for MRIs, the T1ce modality is set as a reference image, and the rest of the modalities are taken as moving images.
You can also use a template image such as MNI-152 template as the reference image and co-register your custom dataset to the template to make sure your data is spatially, temporally, and anatomically aligned!
ii. Initialization
Start by initializing the transformation between the reference and moving images as shown in the demo video. This step establishes a baseline alignment, making subsequent adjustments more manageable.
You can manually adjust the position, orientation, and scaling of the moving image to align it with the reference image. For this, you can use the intuitive controls within the Transforms module to make precise adjustments.
iii. Validation and Fine-Tuning
Once the initial alignment is complete, you can validate the results by inspecting the alignment of anatomical landmarks or features. Fine-tune the transformation parameters as needed to achieve optimal alignment.
6 – Resample Moving Image
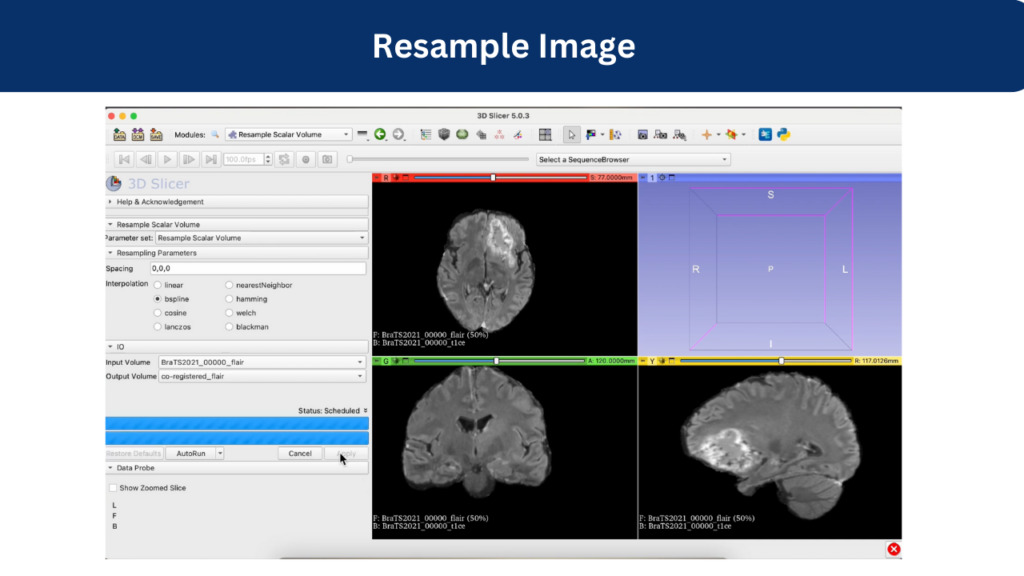
Resampling after manual co-registration is crucial to make sure that the aligned images maintain consistency in spatial orientation, resolution, and voxel size. Here’s why:
- During manual coregistration, the process may involve translation, rotation, or scaling of the images to achieve alignment. Resampling ensures that the aligned images are spatially aligned to a common coordinate system, allowing for accurate comparison and analysis.
- Resampling helps create a uniform voxel grid across the aligned images. This uniformity ensures consistency in the size and shape of voxels, which is essential for subsequent image-processing steps such as segmentation, registration, and quantitative analysis.
- Resampling involves interpolating voxel values from the original images to generate the newly aligned images. This interpolation process helps preserve image integrity while adjusting for changes in spatial orientation, ensuring minimal loss of information during alignment.
- Resampled images are essential for image fusion techniques, where multiple aligned images are combined to create a composite image with enhanced information.
7 – Saving Aligned Images and Transform Model
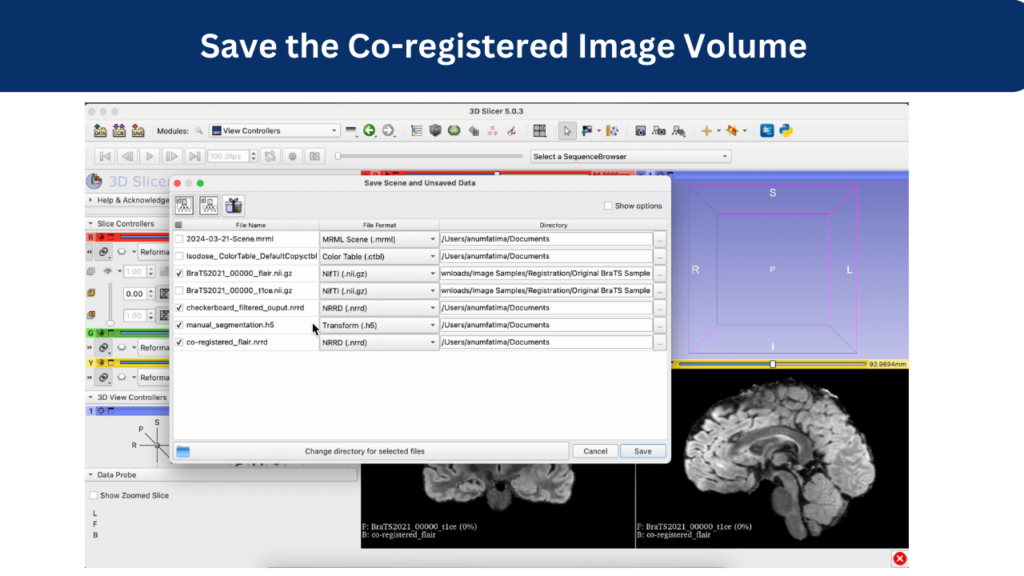
Finally, you can save the aligned images along with the transformations using the Save option of the 3D Slicer tool.
Choose the appropriate file format for saving your images. Common formats include DICOM, NifTI, Nrrd for 3D images.
Up Next: Automatic Co-registration with 3D Slicer
Manual coregistration is an invaluable technique in medical imaging, offering precise control and fine-tuning in aligning images. However, as datasets grow larger and image technology advances, the demand for efficient and automatic solutions becomes apparent.
This is where auto-coregistration steps in! In our next tutorial, we’ll dive deeper into auto-coregistration techniques to enhance accuracy and accelerate research and clinical applications.

